How to screen record on a Mac
Press Command + Shift + 5, choose Record Entire Screen or Record Selected Portion in the toolbar, and click Record. To stop, click the stop button in the menu bar or press Command + Control + Esc; the video is saved to your desktop as a .mov file.
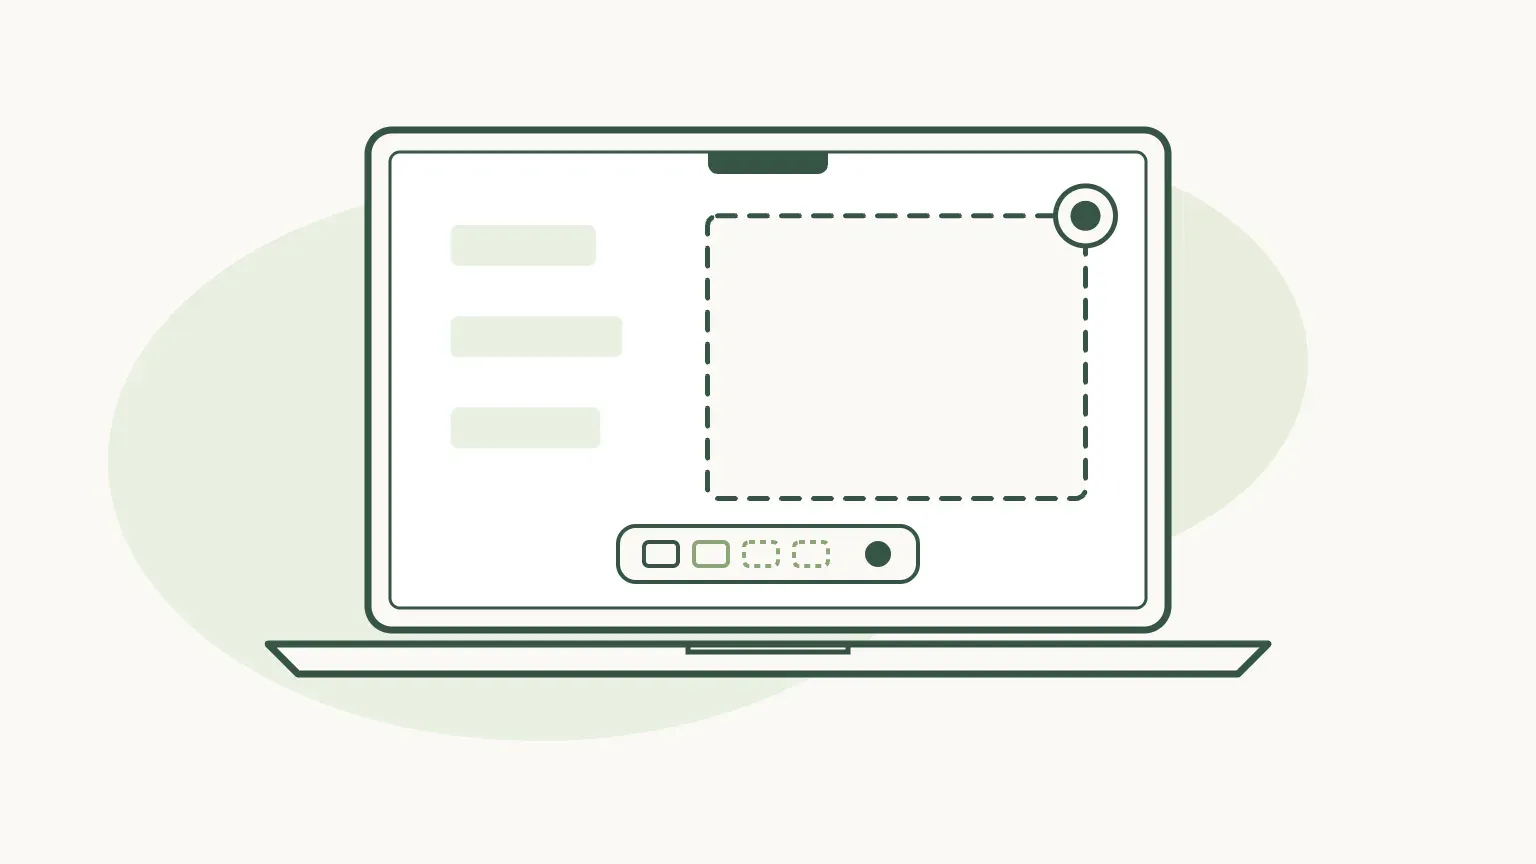
Step by step
Every Mac since macOS Mojave 10.14 has a screen recorder built in: the Screenshot toolbar. It needs no download and no account, and QuickTime Player uses the same toolbar, so the steps below cover both.
Open the Screenshot toolbar
Press Command + Shift + 5 together. A toolbar appears near the bottom of the screen. You can also open Screenshot from Applications › Utilities, or choose File › New Screen Recording in QuickTime Player, which opens the same toolbar.
Shortcut: Command + Shift + 5
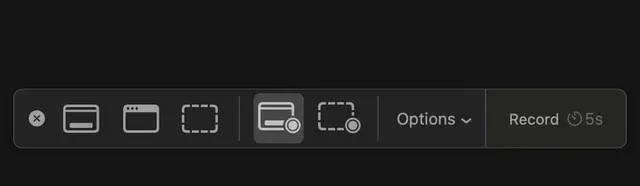
1 Close the toolbar. 2 Record Entire Screen. 3 Record Selected Portion. 4 Options. 5 Record, here with a 5-second timer. Captured on macOS Sequoia 15.8; macOS Tahoe 26 adds Record Selected Window between them. Checked 24 October 2026 against support.apple.com
Choose the whole screen or part of it
The first three buttons take still screenshots; the recording buttons have a small circle in the corner. Click Record Entire Screen to record everything, or Record Selected Portion and drag the box over the part you want. On macOS Tahoe 26 or later, Record Selected Window records one window.
Checked 24 October 2026 against support.apple.com
Set the microphone and other options
Click Options. Under Microphone, pick the one to record your voice; None records no sound at all. Here you also choose where the file is saved, a 5 or 10-second timer, and Show Mouse Clicks, which draws a circle where you click. On macOS 27 or later, Include System Audio adds the sound your Mac plays.
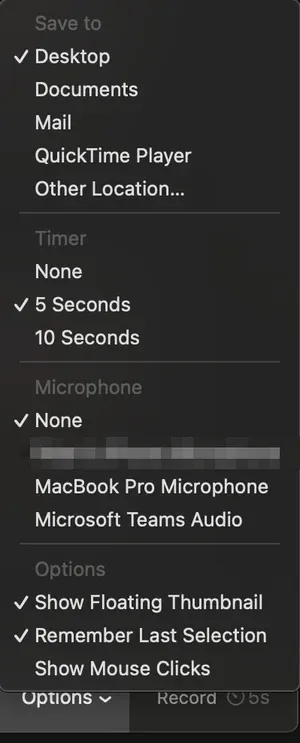
1 Save to: where the file goes. 2 Timer. 3 Microphone: None records silence. 4 Show Mouse Clicks. macOS Sequoia 15.8, which has no system audio choice; one device name is blurred. Checked 24 October 2026 against support.apple.com
Click Record
Click Record at the right of the toolbar. For a selected portion, recording starts on that area only. To cancel before you start, press Esc.
Checked 24 October 2026 against support.apple.com
Stop the recording
Click the stop button in the menu bar at the top of the screen, or press Command + Control + Esc. A thumbnail slides into the bottom-right corner: click it to trim or share the recording, or leave it and the file is saved. If the stop button is missing or macOS keeps asking to allow recording, see how to stop screen recording on a Mac.
Shortcut: Command + Control + Escape
Checked 24 October 2026 against support.apple.com
Record a Mac screen with sound
Your voice is easy: choose a microphone under Options before you click Record. The sound your Mac plays, a video, a call or an app, depends on your version of macOS. Check it under Apple menu › About This Mac.
If a recording comes out silent, the microphone was almost always left on None. The toolbar remembers your last choice, so set it once and it stays. To check that the Mac can hear you at all, try the microphone test in your browser first.
For a narrated walkthrough, the Mac narration guide covers microphone placement and levels. To record the computer’s own sound on a version before macOS 27, the Mac computer audio guide compares the routes that work.
- macOS Mojave 10.14 to Sequoia 15: whole screen or a selected portion, with a microphone. No system audio.
- macOS Tahoe 26: adds Record Selected Window, and on supported Macs a choice of SDR (H.264) or HDR (HEVC).
- macOS 27 Golden Gate: adds Include System Audio, so the Mac’s own sound can be recorded with or without a microphone.
Show your face while recording
The Screenshot toolbar has no camera option. The usual workaround is QuickTime Player: choose File › New Movie Recording, then View › Float on Top, shrink the camera window and drag it to a corner. Then press Command + Shift + 5 and record the screen as usual; the camera window is recorded along with everything else.
It works, with limits. The camera window sits on top of whatever you are showing, it is square-cornered and cannot be moved afterwards, and it uses the Mac’s processor for both the preview and the recording, so an older MacBook Air may run hot. Run the webcam test first if you are not sure which camera the Mac will use.
Where Mac screen recordings are saved
By default on the desktop, named Screen Recording followed by the date and time, for example “Screen Recording 2026-10-24 at 10.15.32.mov”. Change the folder under Options › Save to: Documents, Mail, QuickTime Player, or Other Location for any folder you like.
Recordings are QuickTime movie files (.mov). They open in QuickTime Player, iMovie and most editors, but some websites and Windows apps prefer MP4: the MOV to MP4 converter changes one in the browser. A long recording of a full Retina screen can run to several gigabytes; the MOV compressor makes it small enough to send and can keep it a MOV.
Allow an app or browser to record the screen
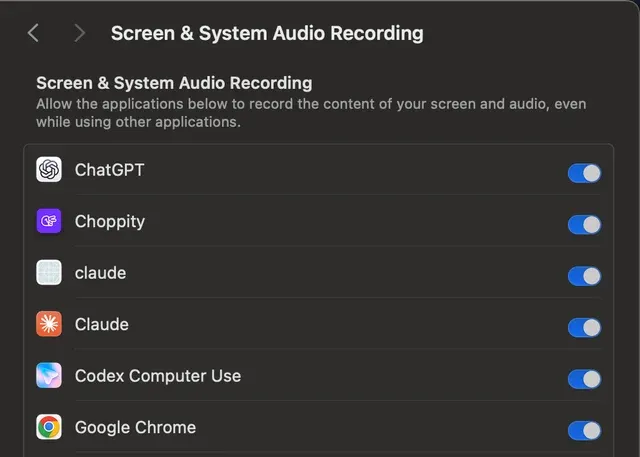
The built-in toolbar needs no permission. Any other app does, including a browser: the first time Chrome, Edge or another app asks to record the screen, macOS stops it and asks you to allow it in System Settings › Privacy & Security › Screen & System Audio Recording. Turn the app on, then quit and reopen it when macOS asks you to.
On macOS Sonoma 14 and earlier the same list is called Screen Recording. If an app’s recordings show only the desktop wallpaper or a black window, it is usually missing from this list.
MacBook Air and MacBook Pro
A MacBook Air and a MacBook Pro record the screen the same way as any Mac: the same shortcut, toolbar and options. The differences are in the hardware around it.
On a MacBook with a notch in the screen, from the 2021 MacBook Pro and the 2022 MacBook Air on, a crowded menu bar can hide icons behind the notch, the stop button included. If you cannot see it, press Command + Control + Esc to stop. On a MacBook Pro with a Touch Bar (2016 to 2020 models), the Touch Bar shows the capture controls while the toolbar is open.
The built-in microphone on a MacBook picks up the keyboard and fans. For anything you will share, a headset or USB microphone sounds better, and the Mac narration guide explains how to set it up.
Record and edit in the browser with Rescreen
The Screenshot toolbar makes a file and stops there: no camera, no cuts, and a large .mov to upload yourself. Rescreen records in Chrome, Edge or Safari on a Mac with nothing to install, and gives you a link to send.
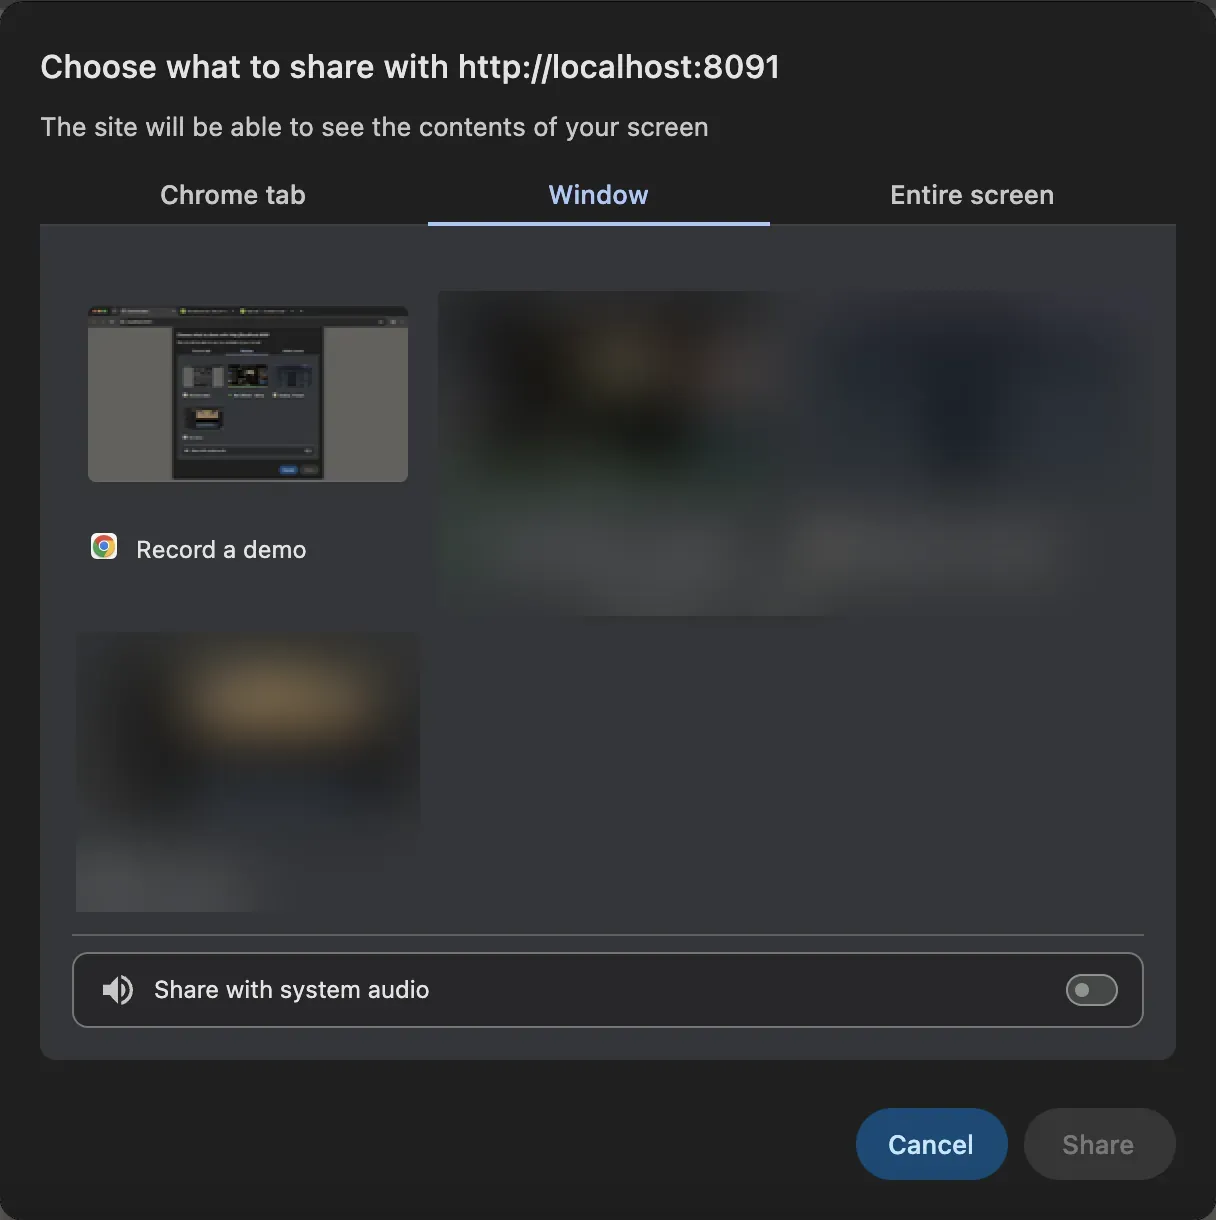
Pick your microphone and camera, then choose what to share in the browser’s own picker. What sound comes with it depends on the browser. In Chrome or Edge, share a tab and keep Share with tab audio on to include that tab’s sound; Chrome 141 or later on macOS Sonoma 14.2 or later also offers Share with system audio, the Mac’s own sound, when you share a window or the entire screen. The Chrome guide shows each choice. Safari shares a screen or a window, with your microphone but no computer sound.
Like the built-in tool, the browser needs the Screen & System Audio Recording permission the first time.
What Rescreen does when you stop
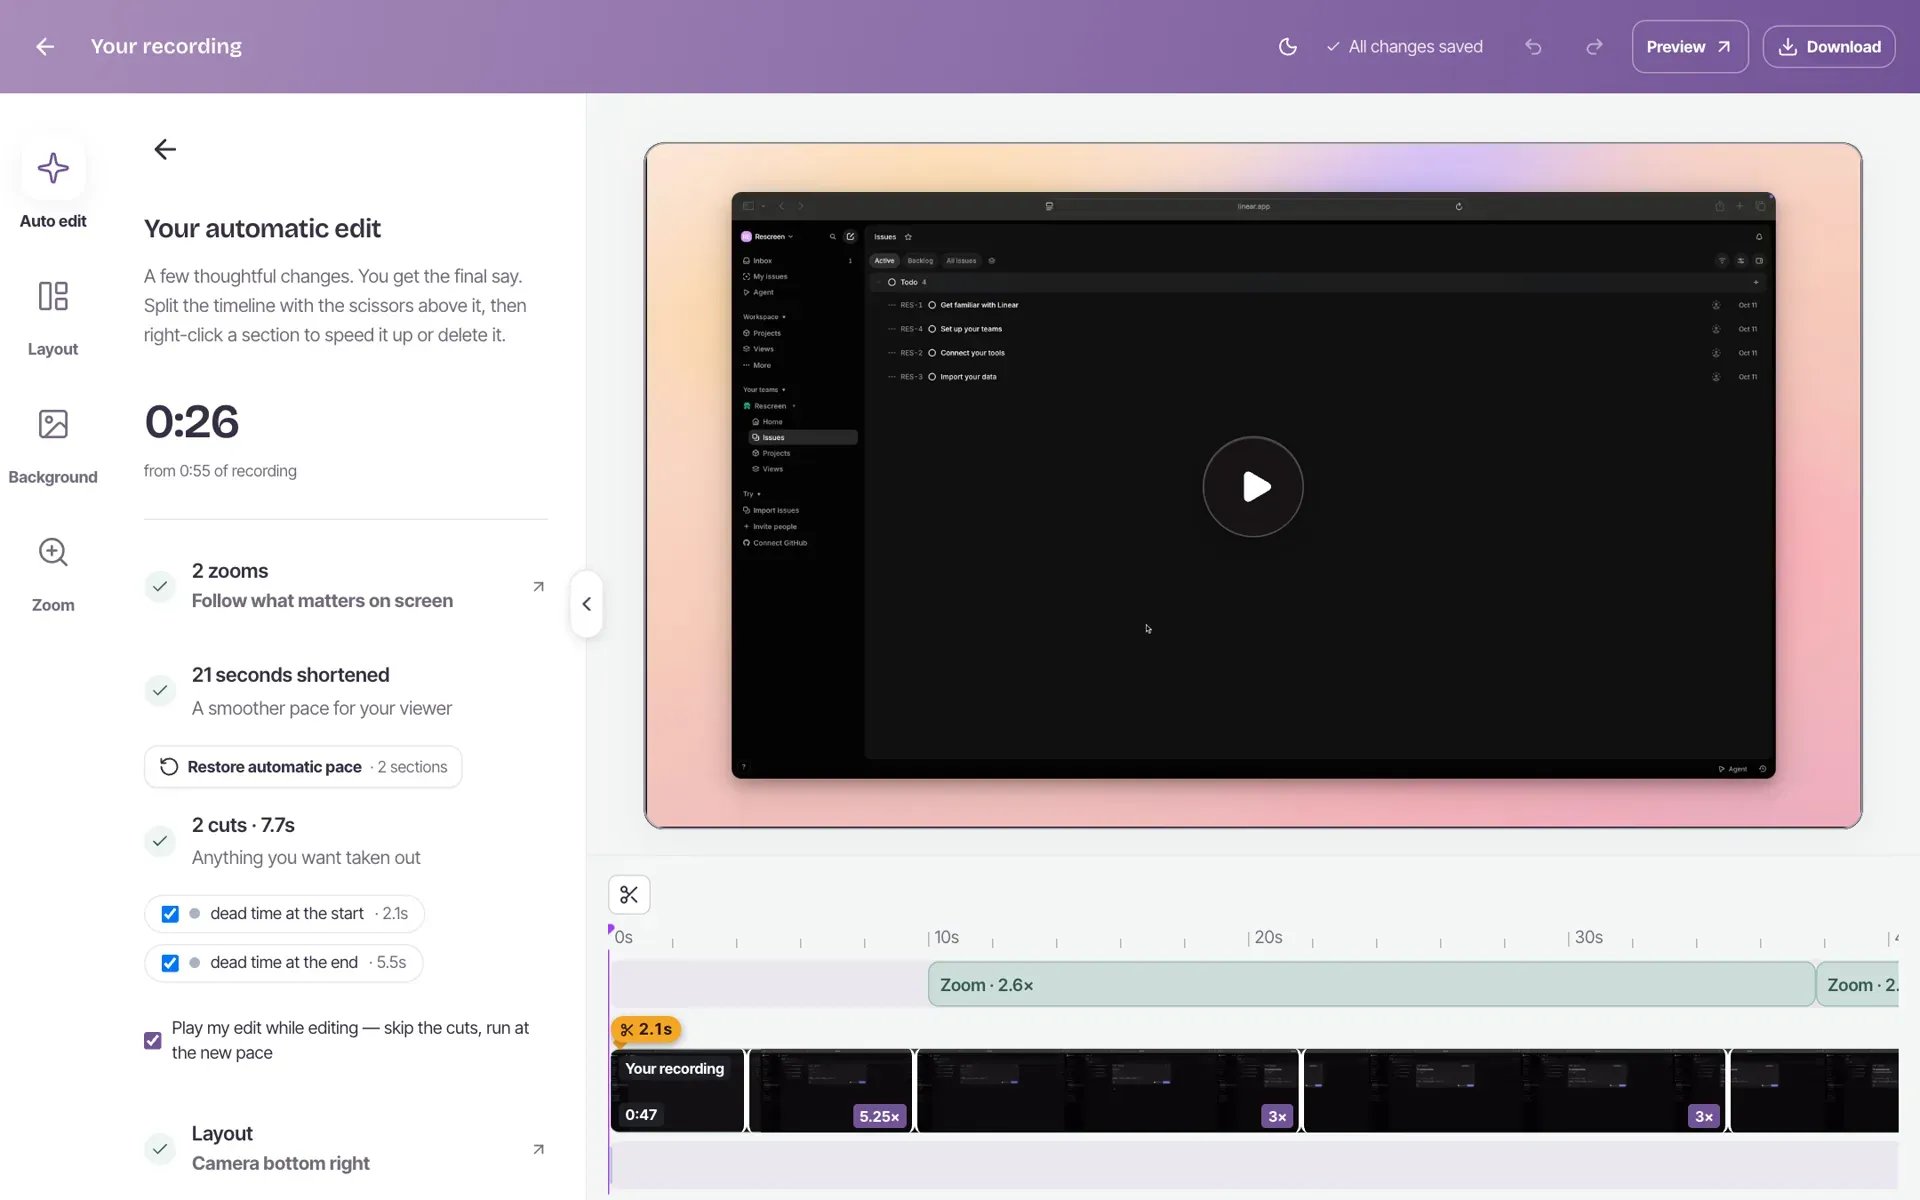
The take is already uploaded when you click stop, so there is no large .mov to move around. Rescreen cuts dead time and long pauses, speeds up slow stretches, zooms in to follow what matters on screen, and puts your camera in a round bubble over the screen.
Every change is listed in the editor with a tick box, and you can put any cut back or split the timeline yourself before you copy the link. If you need a file, download it as an MP4 instead.
macOS Screenshot toolbar or Rescreen
| macOS Screenshot toolbar | Rescreen | |
|---|---|---|
| Audio | Microphone. System audio on macOS 27 or later. | Your microphone, plus the sound of a browser tab, or of the whole computer where your browser offers it. |
| Webcam | None. A QuickTime camera window can be recorded with the screen. | Your camera in a round bubble over the screen, or the camera on its own. |
| Editing | Trim only, in the thumbnail or QuickTime Player. | Done when you stop recording: cuts mistakes, retakes, filler words and silences, zooms into what you do, reduces noise and levels your voice, speeds up still screens. |
| Length | No limit stated by Apple; bounded by free disk space. | Up to five hours per recording, on the free plan. |
| Sharing | A file on the desktop or the folder you chose. | A link anyone can watch without an account. |
| File format | QuickTime movie (.mov). | MP4 download in 4K, 2K or HD on Pro. |
| Cost | Free, built into macOS. | Free. Pro is $10 / month billed $120 yearly, or $20 monthly. |
What macOS Screenshot toolbar can't do
- No system audio before macOS 27: only a microphone, or silence.
- No camera on the recording, except a QuickTime window recorded along with the screen.
- Editing is a trim in the thumbnail or QuickTime Player. No cuts in the middle, no captions.
- Files are .mov, often several gigabytes for a long full-screen take, and you share them yourself.
- Some apps, such as the Apple TV app, block recording of their windows.
If it doesn't work
The recording has no sound
Open Options and choose a microphone; None records silence. For the Mac’s own sound you need macOS 27 or later and Include System Audio, or another recorder on earlier versions.
There is no screen recording button in Control Center
Control Center on a Mac has no screen recording button; that control is on iPhone and iPad. Press Command + Shift + 5, or open Screenshot from Applications › Utilities.
I cannot find the stop button
On a MacBook with a notch, the menu bar may have hidden it behind the notch. Press Command + Control + Esc to stop; the file is saved as usual.
A browser or app records a black screen or only the wallpaper
Turn the app on in System Settings › Privacy & Security › Screen & System Audio Recording, then quit and reopen it. Some apps, such as the Apple TV app, block recording on purpose.
The recording is not on the desktop
Press Command + Shift + 5, open Options and look at Save to: the tick shows the folder in use. If it says QuickTime Player, the recording opened there and is saved once you save it.
Questions people ask
How do I screen record on a Mac?
Press Command + Shift + 5, choose Record Entire Screen or Record Selected Portion, and click Record. Stop it from the menu bar or with Command + Control + Esc.
How do I record video with sound on my MacBook?
Press Command + Shift + 5, open Options and choose a microphone under Microphone before you click Record. On macOS 27 or later, also choose Include System Audio to record what the MacBook plays.
How do I screen record on a MacBook with media sound?
On macOS 27 or later, turn on Include System Audio in the Screenshot Options menu. On earlier versions the built-in tool cannot record media sound; use a browser tab share with tab audio, or one of the routes in our Mac computer audio guide.
How do I get sound when I screen record on a Mac?
Choose a microphone in the toolbar’s Options menu; the default can be None. Make a five-second test recording and play it back before a long take.
Why doesn’t my Mac screen record with sound?
Usually because the microphone is set to None, or because you expected the Mac’s own sound on a version before macOS 27, which cannot record it with the built-in tool.
Why can’t I find screen recording in my Control Center?
A Mac’s Control Center has no screen recording button. Use Command + Shift + 5 instead, or open Screenshot from Applications › Utilities.